This Celebrity Manicurist Created an Instagram-Worthy Sketchbook for At-Home Nail Art
Julie Kandalac, often called Julie K., has spent the past decade creating nail looks for magazine covers, runways, red carpet events, and Essie campaigns. She was also the founding creative director of Paintbox, an NYC-based nail studio that specializes in on-trend nail art. This month, she launched her first ever product, and no, it’s not nail polish. Kandalec wrote, designed, and self-published Nail Art Design Book, a workbook for both professionals and nail art lovers to play, plan, and dream up new mani looks.
THE IDEA
THE IDEA
The idea for this book—a canvas for swatching, practicing designs, and displaying nail art—came to Kandalec while planning out nail looks for a very large shoot. «A few years back, I landed a dream gig: creating 40 different nail looks for a magazine cover,» Kandalec says. «It was an exciting but overwhelming opportunity. I didn’t know where to start. I eventually decided to sketch out the designs on paper instead of painting them on fake nails as I usually would.»
THE AT-HOME ANGLE
Thanks to that shift in strategy, she was able to plan out all 40 of the designs easily and efficiently. «It was a game changer, and I wanted to find a way to take this one step further and share this approach with nail art lovers everywhere. That’s why I spent the next five years fine-tuning this Nail Art Design Book.»
As Kandalec iterated on the book over the years, she would personally use the different versions of it on set. That realtime experience helped her finesse it along the way. «As I was creating my book, I saw the need for it more and more. Consumers and nail artists alike were curious as to what it was, and I would tease a corner of a page here or there backstage or on set.»
THE EXECUTION
The 42-page, metallic-gold inked book was bound to lie flat to prevent polish drips. The paper was carefully selected for opacity and color accuracy when swatching polish or gel. The book also includes educational elements like color theory, polish combination inspiration, and helpful tips. One tip we loved: Use a clean mascara spoolie for nail prep and to apply glitter. «For prep, dip a clean spoolie in 91% isopropyl alcohol and scrub the cuticle area, sidewalls, and under the free edge for a squeaky-clean nail prior to applying your base coat,» Kandalec explains.
«And to add glitter, dip a clean spoolie into your glitter, hold it above freshly painted nails (while still wet) and gently tap the spoolie to evenly distribute glitter onto the nail.»
There are two different cover options to choose from and the artwork for each was created using actual nail polish. «The covers were inspired by my long-time love of color combinations and how they work together to make new shapes and textures,» Kandalec explains. «For each cover, I used about 10 different lacquers. I wanted artwork that spoke directly to the nail artist and looked beautiful on a desk or even just on display. The metallic gold foil on the cover was the final step.»
Need some inspo to kick off your personal nail art gallery? Kandalec shares how to create one of her favorites here:
THE SNEAK-PEAK TUTORIAL: MOD POLKA DOTS
1. Use polish, a pen, or markers to lay out your design.
2. Manicure your nails, then apply base coat.
3. Apply black to one half of each nail, alternating sides, and alternating between horizontal and vertical splits. Tip: Dip an angled eyeliner brush into pure acetone (not acetone polish remover, that could leave oils on the nail) to perfect the edges of the black shapes.
4. Apply top coat (this prevents smearing).
5. Customize an orangewood stick by filing the tip down to a very fine point.
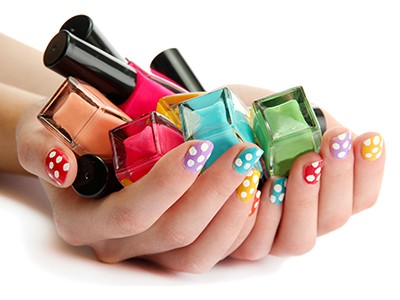
6. Dip the orangewood stick into white polish and gently apply to your nail at a 90' angle to create the dots.
7. Allow to dry completely. Then apply another layer of top coat.
Source : www.byrdie.com
Author: Loni Venti
Global Fashion Shop provides you with professional nail care and modeling products.
Other articles:
- What is the russian manicure? Here's what experts say
- Causes of nail brittleness: the solution
- Tips or molds? What is better for nail extension?
- A manicure that attracts men
Published: 06.04.2022 15:06
Times Read: 4426
77 bought
ID: 8210
3,99 £
199 bought
ID: 5869
3,99 £
32 bought
ID: 8211
3,99 £
